Distributed Collaborative Calendar User Manual CASSIS Project, LORIA-INRIA
User Manual
Distributed Collaborative Calendar
for IPhone
Developed by:
CASSIS Project
LORIA-INRIA team
http://www.loria.fr/equipes/cassis/
Table of Contents
Introduction
Application Overview
2.1 Key Features
2.2 Limitations
Application Entities
3.1 Event
3.2 Rule
3.3 Policy
Functionality
4.1 Inserting an Event
4.2 Managing Policy (List of Rules)
4.3 Deleting/Editing an Event
Feedback
This application aims to make a collaborative calendar where users can simultaneously modify events and also, control access on events created by them. Controlling access consists of allowing other users to Read/Delete/Edit events but not all users (only to those users to whom a user wants to). The user who inserts an event is the administrator of that event. The administrator can give permission to selected users to delete/edit that event by creating a policy. A policy is a list of rules where each rule allows/denies permissions of Read/Delete/Edit to a subset of users on a subset of events. Each user is allowed to insert an event in the calendar. Events in the calendar are sorted in increasing order of date and time of events. The application takes care of it automatically and finds the suitable position of new event inserted by the user based on it's date & time in the list of events.
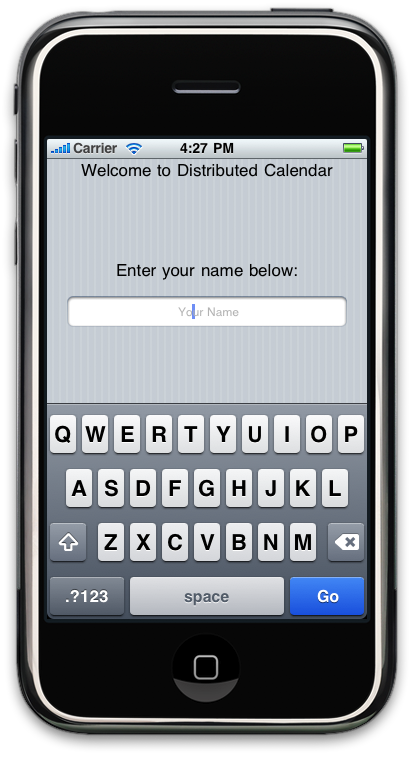
Fig.
1: Application prompts user for his/her name at start-up
Any number of users can take an action (action means deleting/editing an event) on an event at a particular point of time, but the application will take care of it and resolve this issue to have a single converged, consistent copy of the calendar.
Application also takes care of conflicts caused by change in policy and modification of events. For example, at time t1, a user u1 is authorized to 'delete' an event (whose administrator is u2) but let's say, at time t2, administrator (u2) revokes the right of deletion for that user and at the same time, u1 deletes that event. These type of conflicts are automatically resolved by the application.

Fig.
2: 'Available Peers' view
At start-up, application asks user to enter his/her name (Fig. 1) and then, show the list of other available users when user is done entering the name (Fig. 2).
Any number of users can start the collaborative session and for as long time as they want. Session is up and running if at least, one user is online.
Every user is authorized to insert the event in the calendar but a user can edit or delete only those event for which (s)he is authorized to delete or edit.
By default, the user who inserted the event is the administrator of that particular event and (s)he has all rights for that event i.e. (s)he can delete/edit that event.
A user can also allow/deny others to delete/edit his/her events by managing his policy. By default, other users except administrator are not allowed to delete/edit the events. An administrator has to explicitly give permissions to other users by managing his/her policy.
A user can go to policy management view at any time during the application run-time and modify his policy. Policy management consists of inserting or deleting rules in the policy.
A user can't deny other users to see his/her events. An event created by a user is available to all other users for reading.
A user can't create his own local group. The application doesn't have the functionality of multiple groups. All users are part of a global application group.
Any number of users can start the collaboration session but it's not possible to join the session in the mid of application run-time.
Below are three entities which are worth describing before proceeding any further:
An event consists of three attributes: <Title, Location, Date & Time> where each attribute's name is self describing. For demonstration, let's take an example of appointment with the doctor. See Fig. 3.
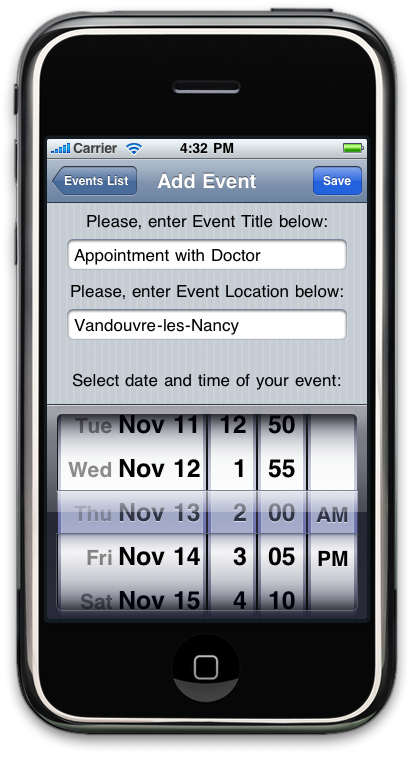
Fig.
3: Defining attributes of an event in 'Add Event' view
A rule is a quadruple <Peer(s), Event(s), Right(s), Permission> where
Peer(s) can be any subset of all available peers except the user who is inserting the rule;
Event(s) can be any subset of all events created by that particular user;
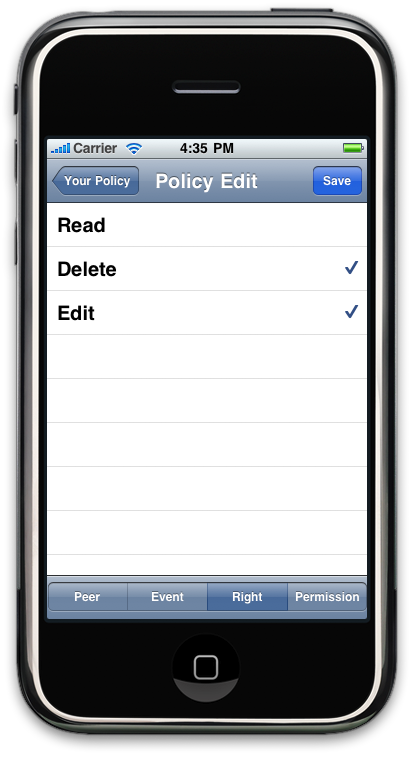
Right(s) can be any subset of set <Read, Delete, Update>;
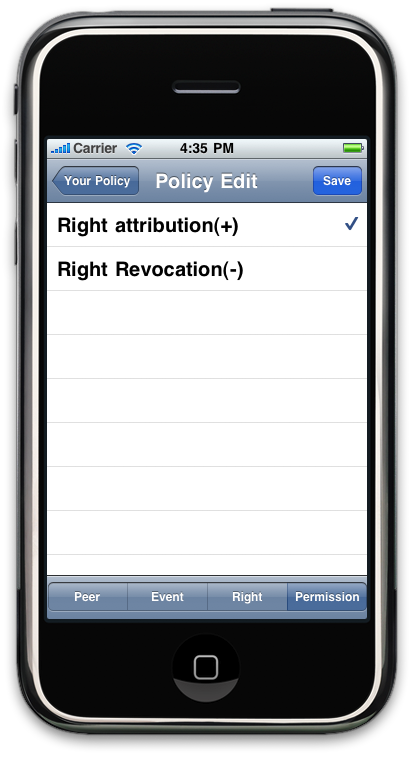
Permission can be attribution or revocation of rights.
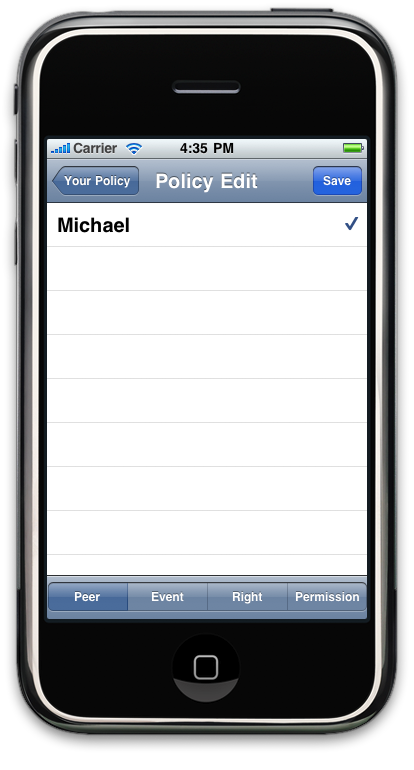
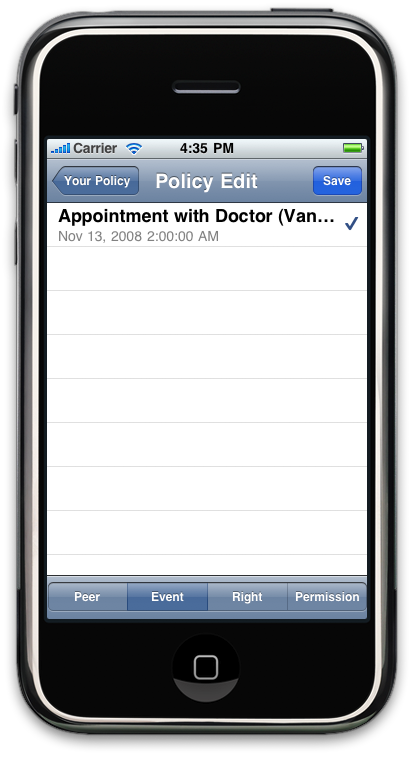
One can select the peers from the list of available peers, events from the list of events (only the events created by that user will be shown/available to select in that view), rights which (s)he wants to attribute or revoke and finally, one can choose Right Attribution/Revocation depending on whether (s)he wants to revoke or attribute rights on these selected events to these selected peers.
For demonstration, let's take an example where there is an available peer: <Michael> and an event: <Event 1> where Event 1 = {Title: Appointment with Doctor Location: Vandouvre-les-nancy Date & Time: 13 November 2008 02:00AM}. Keep in mind that a user is administrator of only those events which (s)he has inserted. Now, suppose, administrator wants to give Delete and Edit right for Event 1 to Michael. So, in this case, we will have to select 'Michael' from the list of peers, 'Event 1' from the list of events, 'Delete' & 'Edit' from the list of rights(Read, Delete & Edit) and 'Right Attribution' from the list of permissions(Right Attribution & Right Revocation).
See below Fig. 4 to have a look on how this selection is done:
|
|
|
|
|
|
Fig. 4: Selection of various attributes to insert a new rule
Policy is an indexed list of rules. When a user (apart from administrator/creator of that event) wants to delete/edit an event, the application needs to check whether (s)he is allowed to do that action or not. The application checks rules one by one in policy (indexed list of rules), starting from the first rule and stopping when it reaches the first rule that matches it's request. If no matching rule is found, that action can't be taken.
Let's have a look on policy having one rule in the below Fig. 5.

Fig.
5: Policy view having one rule
Here, in this Fig. 5, you may have noticed that unique 'Event ID' is also shown along with 'Event Title' in this rule, just to let the user distinguish between events when two or more events will have the same 'Event Title'.
The application starts execution by prompting the user to enter his/her name. Once the user is done with it, it shows the list of other available peers. From this list, user can have a look on peers which are online at that time. Next, by pressing 'Calendar' button on top-right corner, (s)he will be navigated to a new view. In this view, user can create his/her new event and can also see list of events sorted according to date and time of the event. The first row in the table will always correspond to “Create new event” to let user create a new event. User can also select the row corresponding to an event to see the details of that event and if (s)he wants to delete/edit that event. Whether (s)he will be actually able to delete/edit that event, will depend on whether (s)he has right to do that action. If user would like to give right to some other peer to delete/edit his/her event, (s)he will have to create his/her policy.
As depicted below, these are three major actions a user can take in this application:
To insert a new event, user has to select the first row 'Create new event' in the 'Events List' view.
Selecting this will navigate the user to a new view 'Add Event' (Fig. 3) where (s)he can insert title and location of the event and pick the date and time of the event from date and time picker.
Pressing 'Save' button at top-right corner, will insert this new event in the calendar and will navigate your view back to 'Events List' view. The event will automatically be inserted at the position where it should be according to its date and time. Events are displayed in increasing order of it's date and time.
See Fig. 6 to see 'Events List' view where first row will always correspond to 'Create new event' and others will present the list of all events sorted in increasing order of date and time of events.
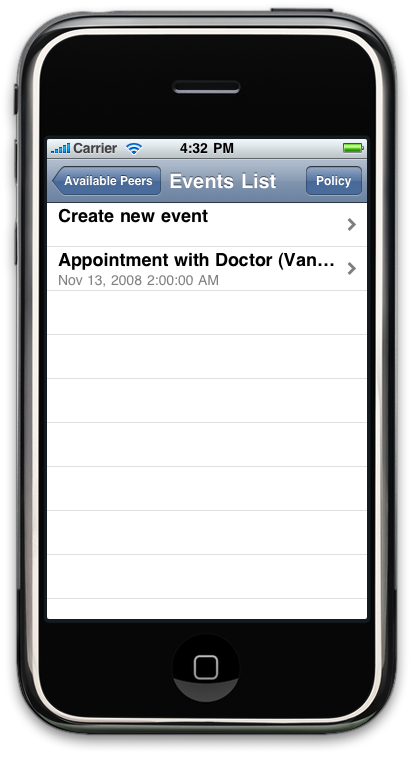
Fig.
6: An event inserted in the calendar
If the event attribute's are too large to be shown in one cell; user will see a truncated view of the event (like the event in Fig. 6). To see all the attributes, user has to select the row corresponding to that event, this will navigate the user to a new view “Event Details” (Fig. 7). A user can also see some event specific attributes like owner of that event and unique event ID of that event in this view (Fig. 7).
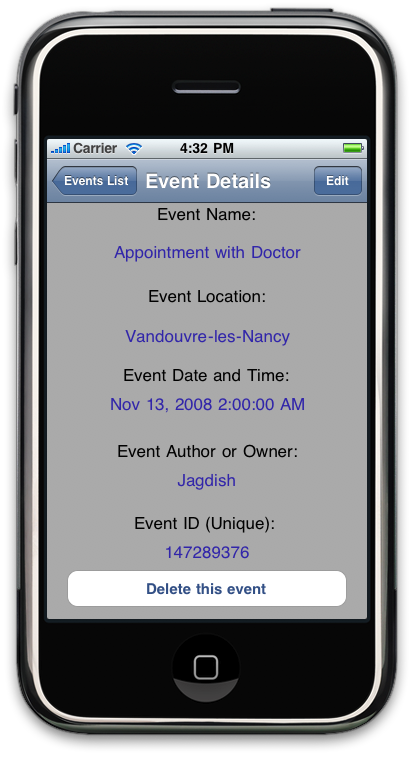
Fig.
7: 'Event Details' View
A user can insert a rule anywhere in the policy and can delete any of the existing rules from the policy. To insert a rule at a specific position, a user has to select a row corresponding to a rule after which (s)he wants to insert the rule. If the user doesn't select a row, the rule will be inserted at the top of list.
For demonstration, in Fig. 5, we have one rule (corresponding to first row in the table) in the policy. If a user wants to insert a rule after (below) this rule, user will have to first select this row corresponding to this rule (Fig. 8), and then, (s)he will have to press the button 'Insert'.
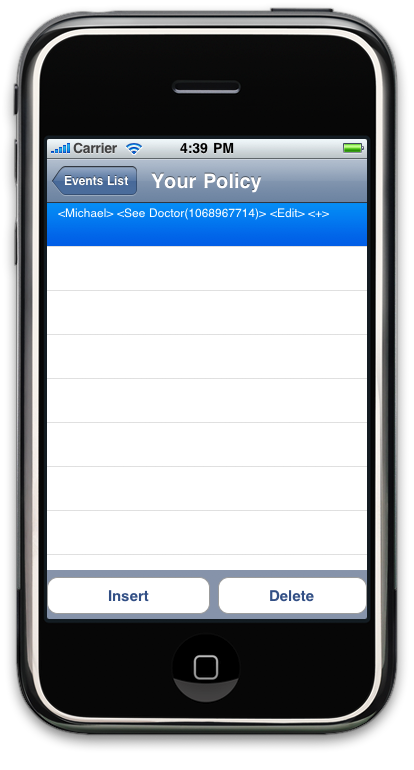
Fig.
8: Selection of a row corresponding to a rule to insert a rule at a
specified position
If a user wants to insert a rule at the top of the rules, (s)he will just have to press 'Insert' button without selecting any row. This will insert the new rule at the top of all other rules. The position of rule has importance in the policy because application starts checking a request from the first (at the top) rule in the policy.
Similarly, to delete a rule corresponding to a row, a user has to select the row corresponding to that event and press 'Delete' button. If a user presses this button without selecting a row, the application will show an alert message to the user stating this fact (Fig. 9).
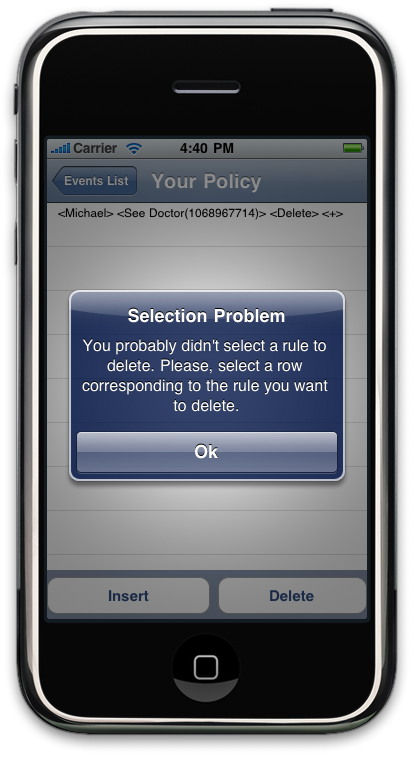
Fig.
9: Warning if user presses 'Delete' button without selecting a row
corresponding to a rule
To delete/edit an event, user has to go to the 'Event Details' view (Fig. 7) of that event by selecting the row corresponding the event. Here, in this view, user can delete an event by pressing 'Delete this event' button at the bottom of the view or can edit that event by pressing 'Edit' button at top right corner of the view.
By pressing 'Delete this event' button, that event will be deleted and user will be navigated to 'Events List' view back. But if the user is not authorized to take this action, a warning message will be shown to the user (Fig. 10) stating this fact.
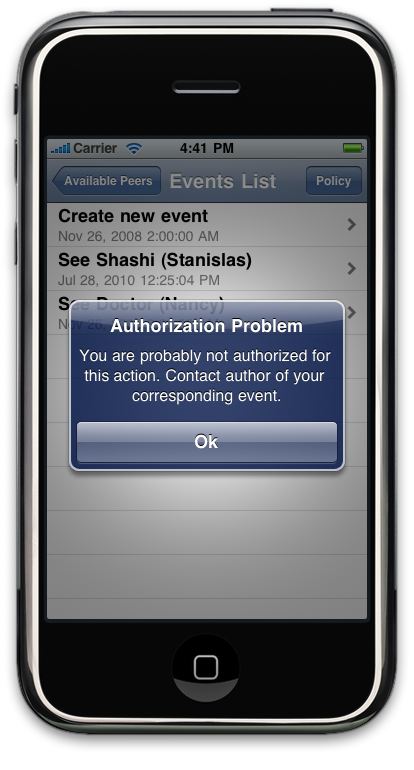
Fig.
10: Warning shown to the user if (s)he is not authorized to do a
particular action
By pressing 'Edit' button, user will be navigated to 'Event Edit' view (Fig. 11) where (s)he can change the attribute's of the event except the 'Event Date & Time'. If user tries to change the event date and time, (s)he will be shown a warning stating the fact that (s)he can't do this and if (s)he wants to change the date and time of an event, (s)he is requested to manually 'Delete' that event and then, 'Insert' new event.
If the user is not authorized to 'Edit' that event, (s)he will get the warning stating the fact that (s)he is not authorized to take that action (Fig. 10).
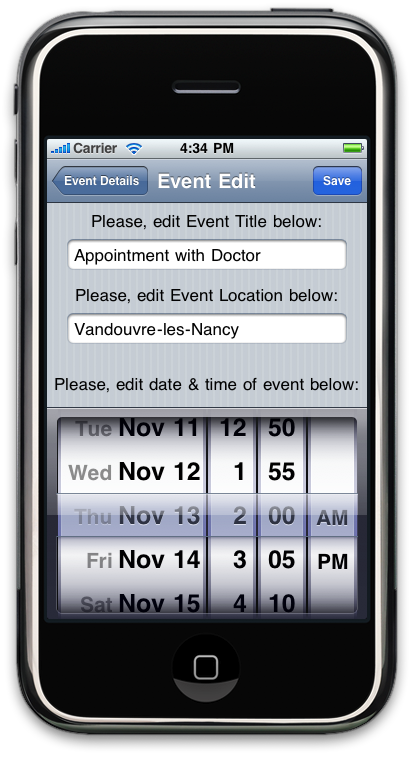
Fig.
11: 'Event Edit' view
For any bugs or suggestions, you are more than welcome to contact CASSIS project at LORIA-INRIA, Nancy, France.